

Every family using a dryer needs to know one critical safety task: cleaning the lint trap and vent prevents house fires and keeps your dryer working efficiently. This simple maintenance job takes just 15 minutes and teaches kids valuable STEM skills about airflow, fire safety, and how everyday machines work. You can learn more about professional services, but most families can handle basic dryer vent care together as a monthly routine.
Why does this matter so much? Clogged dryer vents cause nearly 3,000 house fires each year, and most happen because lint builds up and blocks the air your dryer needs to push hot, moist air outside. When that air gets trapped, temperatures climb dangerously high. The fix is straightforward: clear the lint trap after every load, check the outside vent monthly, and do a deeper clean of the entire vent tube every few months.
This guide turns that essential chore into an engaging family activity. Kids love being “household detectives” hunting for hidden lint, and they’ll understand why hot air needs an escape route just like they need to breathe. You’ll work together using basic tools, practice real problem-solving, and create a safety habit that protects your home for years to come.
Why Dryer Vents Need Cleaning
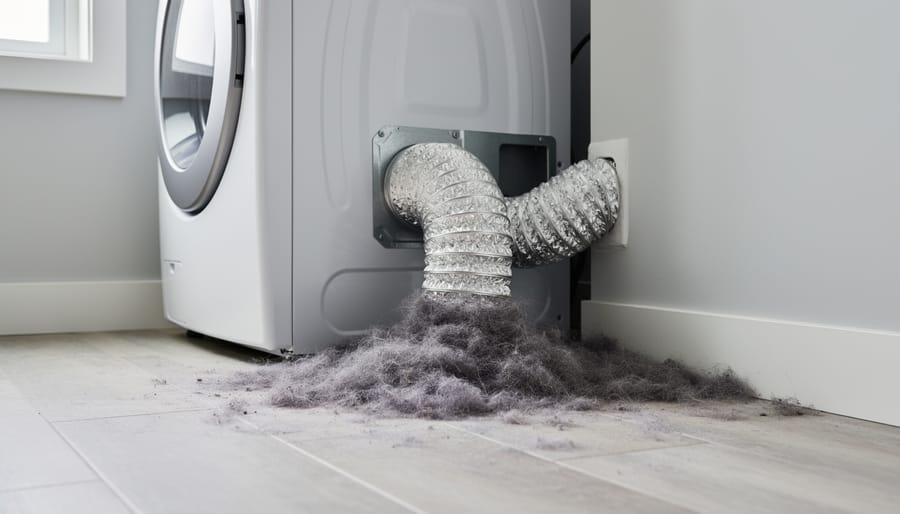
Every time you dry a load of laundry, tiny pieces of fabric called lint break loose from your clothes. Most of that lint gets trapped in the lint screen, but some escapes into the dryer vent, the big tube that carries hot, moist air from your dryer to the outside of your house. Over time, that lint piles up inside the vent like snowdrifts blocking a tunnel.
Think of it like trying to drink a milkshake through a clogged straw. When lint clogs your dryer vent, the hot air can’t flow out properly. The dryer has to work harder and harder, getting hotter and hotter, just like your cheeks getting tired from sucking on that blocked straw. But here’s where it gets serious: lint is super flammable, it catches fire easily.
When hot air can’t escape through a blocked vent, temperatures inside the dryer climb higher than they should. Lint is basically made of tiny fabric fibers, which are perfect fuel for a fire. Add trapped heat to trapped lint, and you’ve got the recipe for a dangerous situation. That’s why this simple cleaning lesson is actually a safety superpower your family can practice together. Cleaning your dryer vent isn’t just about making your dryer work better, it’s about keeping your home and everyone in it safe.
What You’ll Need for the Job
Good news, you probably have everything you need already! Cleaning a dryer vent doesn’t require fancy equipment or a trip to the hardware store. Most families can tackle this job using everyday household items and a little teamwork.
Here’s your supply list for this important safety mission:
- Vacuum cleaner with a hose attachment, pulls lint out of tight spaces where your hands can’t reach
- Dryer vent brush or flexible cleaning rod, scrubs the inside of the vent tube (a wire coat hanger straightened out works in a pinch!)
- Screwdriver, loosens the metal clamp that holds the vent hose to your dryer
- Flashlight or phone light, helps you see into dark corners and spot hidden lint
- Old towel or drop cloth, catches the lint that falls out (it can get messy!)
- A helpful family member, makes moving the dryer safer and turns the job into quality time together
The dryer vent brush is the one tool you might need to buy, and it typically costs less than ten dollars. It has stiff bristles on a long, bendy handle that can twist through the curvy vent tube. If you’re using a DIY alternative like a straightened hanger, wrap an old sock around the end to create a lint-catching surface. Just gather your supplies in one spot before you start, and you’ll be ready to become your family’s official dryer vent cleaning crew.
Safety First: What to Check Before You Start
Before you start your dryer vent cleaning adventure, let’s make sure everyone stays safe. Think of this like getting ready for a science experiment, you need the right setup before the fun begins!
First, always unplug the dryer from the wall. This stops electricity from flowing while you work, which keeps everyone safe from shocks. If you’re not sure where the plug is, ask an adult to show you, it’s usually behind the dryer near the floor.
Next, wait for the dryer to cool down completely if it was recently used. Touch the top of the dryer gently with the back of your hand. If it feels warm or hot, wait at least 30 minutes. A hot dryer can burn you, and nobody wants that!
Moving the dryer is a job for grown-ups or older teens. Dryers are heavy and awkward, and they can tip over or pinch fingers if you’re not careful. Kids can be great helpers by holding the flashlight, fetching tools, or watching for obstacles, but leave the pushing and pulling to someone strong enough to handle it safely.
Step-by-Step: Cleaning Your Dryer Vent
Disconnect and Access the Vent
Start by making sure the dryer is completely unplugged from the wall socket. This is your number one safety rule, so have an adult double-check before anyone touches anything. Next, you’ll need to pull the dryer away from the wall so you can see what’s hiding behind it. Dryers are heavy, so this is definitely a two-person job, ask a grown-up to help you slide it forward carefully, watching out for the power cord and any water hoses if you have a washer nearby.
Once you’ve got some working space, take a look at the back of the dryer. You’ll see a wide, flexible hose that looks like a giant accordion or a bendy tunnel. This is your dryer vent hose, and it connects the dryer to a hole in the wall that leads outside. The hose is usually held on with a metal clamp that looks like a belt. Use your screwdriver to loosen this clamp by turning it counterclockwise (lefty-loosey), then gently pull the hose off the dryer’s exhaust port. You might be surprised by how much lint is already visible right there.
Remove the Lint
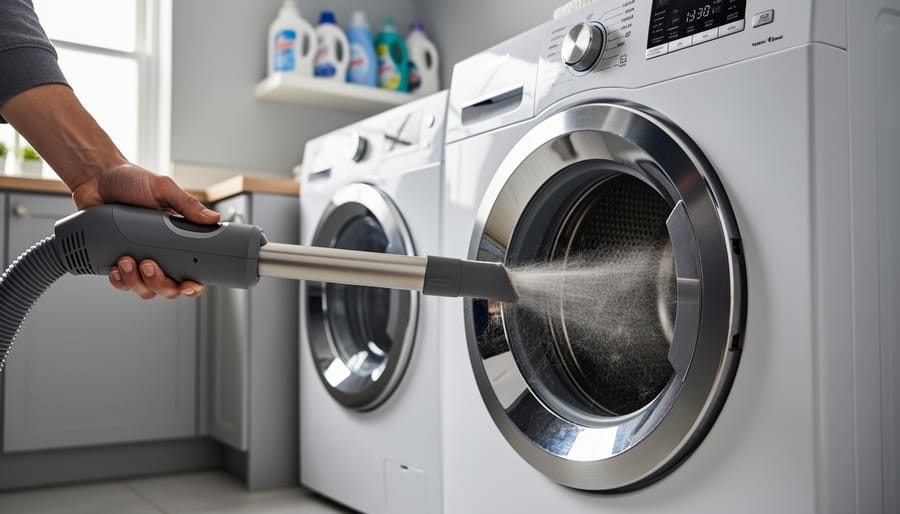
Now for the treasure hunt! You’re about to discover where all those missing socks might be hiding (just kidding, but you will find tons of fuzzy lint).
Step 4: Vacuum the Dryer Opening
Grab your vacuum’s hose attachment and aim it into the opening where the vent hose was connected. You’ll see a round hole at the back of the dryer. Stick the vacuum nozzle as far in as it’ll reach and turn it on. Listen to that satisfying whoosh as clumps of gray, fluffy lint get sucked away! You might be amazed how much lint was trapped in there, blocking the air from escaping properly.
Step 5: Clean Inside the Vent Hose
Now tackle the flexible vent hose itself. If you have a dryer vent brush, push it through the entire length of the hose, twisting as you go. Watch gray clouds of lint appear at the other end, it’s like a lint snowstorm! No brush? No problem. Use your vacuum hose to suck lint from both ends of the vent. Shake the hose gently outside if possible; you’ll see even more lint fall out.
Step 6: Clear the Lint Trap Housing
Don’t forget the lint trap slot! Pull out the screen you normally clean, then vacuum deep inside that narrow opening. Use a flashlight to peek in, you’ll often spot a thick layer of lint coating the walls that the screen missed. This hidden buildup slows down your dryer big time.
Reconnect Everything
Now comes the fun part, putting everything back together like a puzzle! This is where your careful work pays off.
Step 7: Reattach the Vent Hose
Slide the vent hose back onto the dryer’s exhaust port. Push it on firmly until you feel it fit snugly. If your hose has a clamp (a metal ring with a screw), tighten the screw with your screwdriver, but not too tight, just enough to hold it secure. Give the hose a gentle tug to make sure it won’t slip off. Pro tip: Make sure the hose isn’t squished or bent. Smooth, straight hoses let air flow better.
Step 8: Push the Dryer Back and Plug In
With an adult’s help, carefully push the dryer back into position. Move slowly so you don’t crush the hose or yank it loose. Leave a small gap between the dryer and wall if possible, this keeps the hose from getting flattened. Finally, plug the dryer back into the outlet. Double-check that everything looks neat and nothing’s pinched. You’re almost done!
Clean the Outside Vent
Now it’s time for an outdoor adventure! Step 9 takes you outside to find where your dryer vent meets the world. Look for a small flap or cover on your home’s exterior wall (it’s usually close to where your dryer sits inside). This flap should open easily when you push it gently.
Remove any leaves, lint clumps, or critter nests you find around the opening. Make sure the flap swings freely and isn’t stuck or damaged. This outdoor check matters because even if you cleaned everything inside perfectly, a blocked outside vent traps all that hot air and moisture like a cork in a bottle. When the flap works properly, it lets the hot air escape while keeping rain and animals out. Give it a quick test by having someone inside turn on the dryer briefly while you watch the flap outside, it should push open strongly.
How to Know You Did It Right
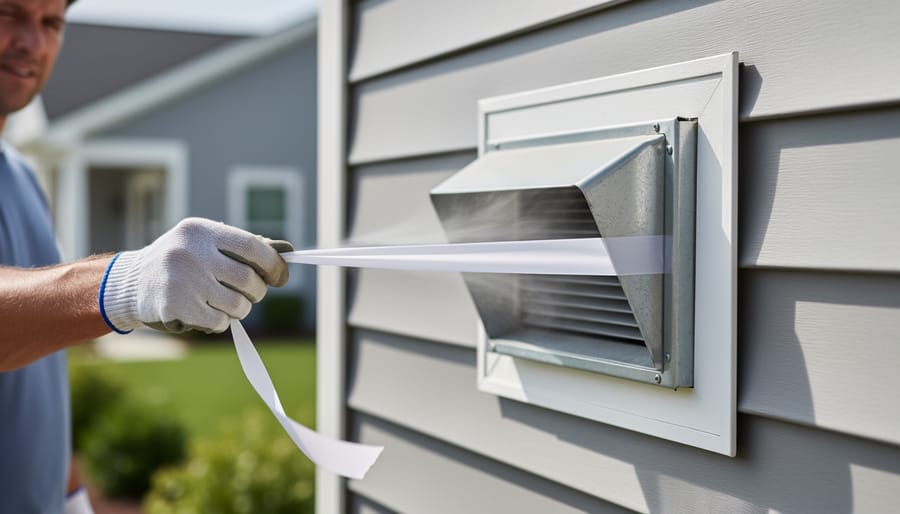
After all that work, you deserve to see the results! The best way to know you cleaned your dryer vent properly is to run a simple test. Ask a grown-up to start the dryer on a normal setting (with no clothes inside is fine). While it’s running, go outside to where the dryer vent opens. You should feel warm air blowing out strongly, like a gentle breeze. If you only feel a tiny puff or nothing at all, you might have missed some lint or the vent could need professional help.
Here’s a fun ribbon experiment kids love: tape a lightweight ribbon or tissue paper near the outside vent opening. When the dryer runs, the ribbon should flutter and dance in the airflow. Strong fluttering means great airflow, which means you did an excellent job!
After your cleaning, watch for these signs that everything is working perfectly:
- Clothes dry in about the same time as when the dryer was new
- The dryer stays cooler on the outside during cycles
- The laundry room doesn’t feel extra hot and humid
- Less lint accumulates in the lint trap between loads
If your next load of laundry dries faster than it did before cleaning, congratulations! You’ve just made your home safer and your dryer more efficient. That’s something worth celebrating as a family.
Make It a Regular Family Habit
The best way to keep your dryer safe is to clean the vent every 6 to 12 months. If your family does lots of laundry or you have pets that shed, plan to clean it more often, maybe every 3 to 6 months. Pick a date that’s easy to remember, like the first day of spring and fall, or your child’s birthday. Put it on the family calendar so everyone knows when vent-cleaning day is coming!
Turn cleaning day into a fun family tradition. Just like you might celebrate with STEM toys or educational games make vent cleaning an exciting science adventure. Kids can measure how much lint they collect, keep a logbook of cleaning dates, or draw pictures of what they found. This hands-on lesson teaches responsibility, safety awareness, and practical skills, all part of valuable STEM education that happens right at home.
The most important daily habit? Teach kids to clean the lint trap after every single load. Make it their special job. Show them how to peel off the fuzzy lint layer and throw it away. This simple two-minute task prevents buildup and keeps the dryer working its best between deep cleans.
Common Questions About Dryer Vent Cleaning
How often should we clean our dryer vent?
Most families should clean their dryer vent every six to twelve months. If you have a big family and do lots of laundry, or if you notice clothes taking longer to dry, clean it more often, maybe every three to six months.
Can kids help safely with this job?
Yes! Kids can be great helpers with adult supervision. They can hold the flashlight, use the vacuum attachment, pull lint out of the hose, and check the outside vent. Just make sure an adult handles unplugging the dryer and moving heavy equipment.
What if our dryer vent is really long?
Long vents (more than 15 feet or with lots of turns) are trickier and collect lint faster. You might need a longer brush or professional help to reach all the way through. These vents often need cleaning every three to six months instead of once a year.
What happens if we skip cleaning it?
Skipping this job is risky. Lint buildup can catch fire from the dryer’s heat, and thousands of home fires start this way every year. Your dryer will also waste energy, your clothes will take forever to dry, and your electric bill will go up.
After you finish the job, you can turn your newfound knowledge into a fun activity. Try creating a dryer vent word search puzzle using all the new vocabulary you learned, like “lint,” “airflow,” “hose,” and “flap.” It reinforces the safety lesson while keeping the learning playful.
You’ve just learned a super important skill that keeps your whole family safe! This simple dryer vent lesson isn’t just about cleaning, it’s about becoming a home safety hero. Every time you clear out that lint, you’re preventing fires, helping the environment by using less energy, and making sure your clothes dry faster. Plus, you got to use cool tools and see science in action.
Mark your calendar right now for your next cleaning adventure. Whether you pick a special day every six months or tie it to a season change, making this a family tradition means your home stays safe and you keep learning together. Remember, even the youngest helpers can check the lint trap after every load and remind grown-ups when it’s time for a deep clean.
So grab your tools, round up your family, and show everyone that safety can actually be fun. You’re not just doing a chore, you’re protecting the people you love. That makes you a real-life safety superhero!
